 PO - Purchase Order
PO
PO - Purchase Order
SPM documentation - July 20th 2009 – Written by Rémi Equoy
Introduction
Purchase Order enables user to generate a document which ordered a list of part number at a specific price to a vendor.
Addresses, Contact and Forwarding agent tabs
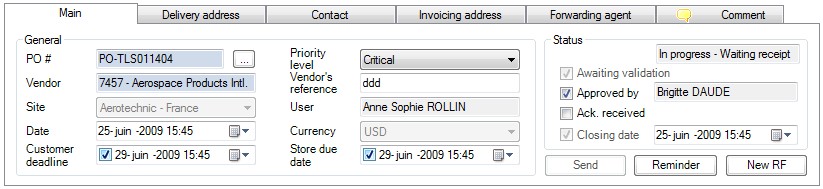
The PO # is defined automatically by using the document default format. You can select another the format or reuse an unused number by pushing the button "...".
The Vendor can be typed or you can obtain a list of customer by double clicking. The vendor have to be created before creating the Requisition.
The Site is the owed site (or outlet)
The Date is the creation day date.
The Customer deadline (optional) is a date filled by the user representing the customer's deadline.
The Priority level can be choose among Routine, Expedite, Critical or A.O.G. .
The Vendor's reference field enables user to type the vendor order reference if there is one.
The Currency is normally defined by the customer (see vendor form) but if the vendor currency is not defined in the vendor card or if you have a customer with multiple currency, you can change the order's currency with this combo box.
The User is the first name and surname of the user who have created the quote.
The Store due date (optional) is a date filled by the user representing the due date for the store manager.
The status describe the state of the Purchase Order. Once approved, almost main information cannot be modified.
The Ack. received is an optional date used to register the acknowledgment received date.
The Closing date is an optional date while the PO is not closed. In this case, this date represent the To close before date. Once the PO is closed this date represent the closing date. This date is very important because the receiving estimate date will be computed with this date plus the estimate delay of each line (see delay in the Part Number grid).
Addresses, contact and Forwarding agent
Once the vendor have been selected, the default contact, the default delivery address and the default invoicing address will be filled automatically.
The user can change the contact list by adding (or deleting) contact coming from the vendor ref card.
The Delivery address and the Invoicing address can be changed by selecting another site (if available in the vendor ref card).
The forwarding agent will be the default one but the user will be allowed to select another one.
For more information see Vendor topic.
The PN tab list the PN which have been (or which will be) added to a Purchase Order.
To add new items or to add items at the end of the list, right click on the upper left corner of the PN list.
Items or PN have to be added in two steps:
The following push-down menu are available :
PN columns :


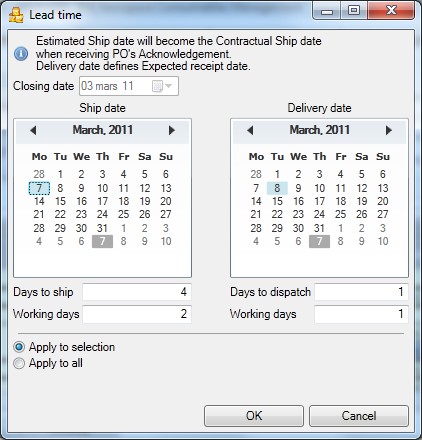
Change Lead time (located into the push-down menu) enables to define the Contractual Ship date and the Expected delivery date:
The Comment tab enables to add a comment into each selected lines :
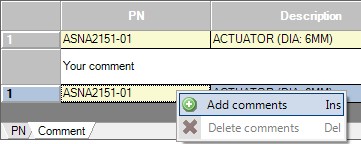
Furthermore this enable to select by ticking information to be included with the comment into the report :
 Use [CTRL] with the left click to automatically tick all check boxes of one column.


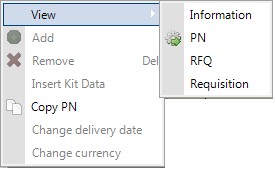
The analytic tabs enables to see linked document :
 See also : Purchase Order' statuses - Reminder -
 See also - Re-provisioning forecast - Minimum quantity manager - Restocking worksheet -
How to...
 Compute the estimated delivery date with a number of Working day
To compute a the date of delivery with a number of working day, type the number of day with a minus sign in the Lead Time column. Once validate, the date will be computed by excluding Saturday and Sunday. Finally the minus value will be replaced by the real number of day between the both date.
Created with the Freeware Edition of HelpNDoc: Free PDF documentation generator